17 Jun Tutorial: Install SSD in your Macbook Pro 2006, 2007 or 2008
An SSD in your MacBook Pro 2006 – 2008: A world opens up for you!
Earlier we showed how you makea computer four times faster using an SSD, and how to use such an SSD can be installed in a MacBook Pro 2011/2012. In this tutorial, we will show you how you can build an SSD into your MacBook Pro from 2006, 2007 or 2008. With photos, descriptions and a list of essentials, you can make your MacBook Pro faster step by step by inserting an SSD in it.
What do we need:
- A new SSD
- MacBook Pro 2006/2007/2008 (not unibody), 15 “/ 17”
- Philips # 00 screwdriver
- Torx T6 screwdriver
- A sharp, small, flat object, such as a knife, guitar pick, or thin tweezers.
- Optional: OS X install USB
- Optional: Time Machine backup
For optional parts, see the end of this manual
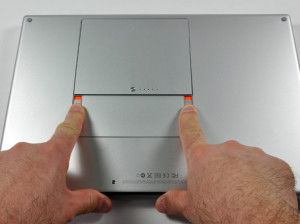
Step 1: Remove the battery
Place the MacBook on a soft surface with the screen at the bottom upside down. Move both battery grips away from the battery at the same time and remove the battery.
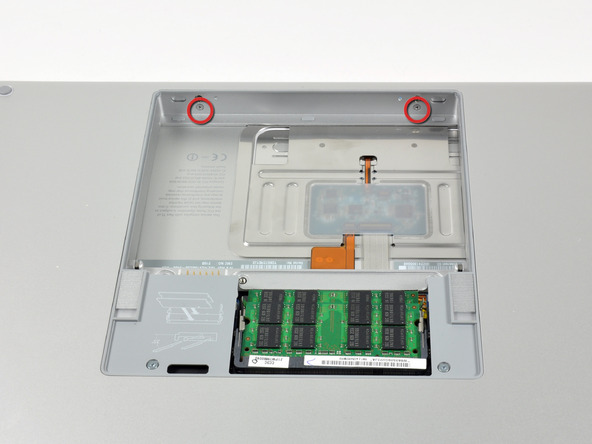
Step 2: Remove the RAM shield
In the opened compartment, near the large orange cable, you will see 2 or 3 screws (depending on your model). Remove this with a Philips # 00 screwdriver and remove the RAM shield.
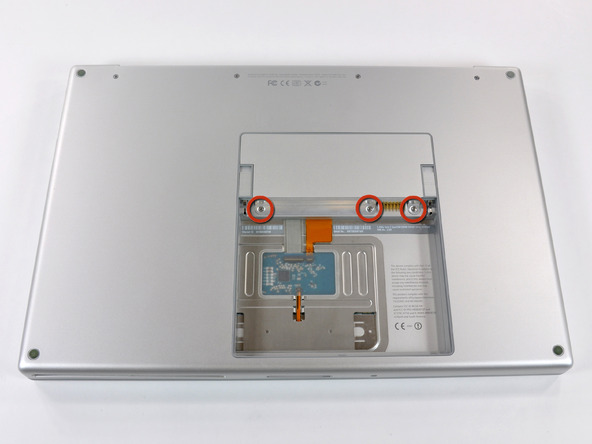
Step 3: Remove the other screws
On the other side of the compartment (“bottom”), you can see 2 or 3 screws. Remove this with a Philips # 00 screwdriver

Step 4: Remove the screws on the bottom
Then remove all remaining screws on the bottom of your Macbook, as shown in the picture.
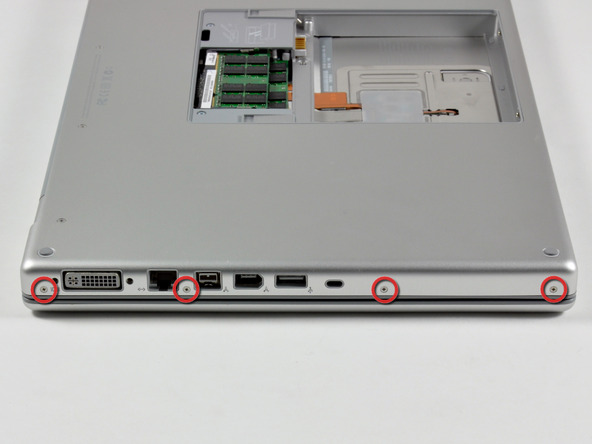
Step 5: Remove the 4 screws on the gate side
Turn the MacBook with the side with ports facing you and remove the 4 screws.
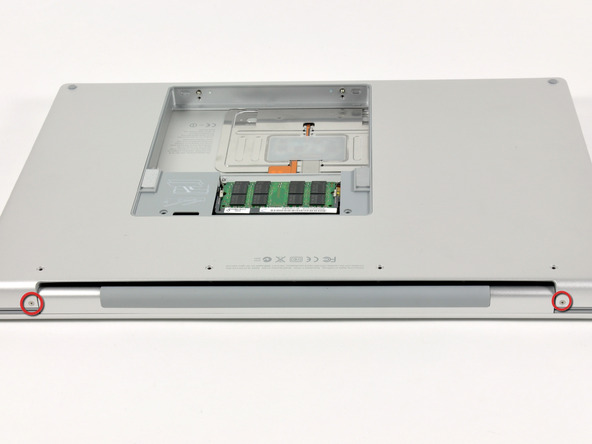
Step 6: Remove the screws on the back
Turn the MacBook with the back to you and remove the 2 screws.
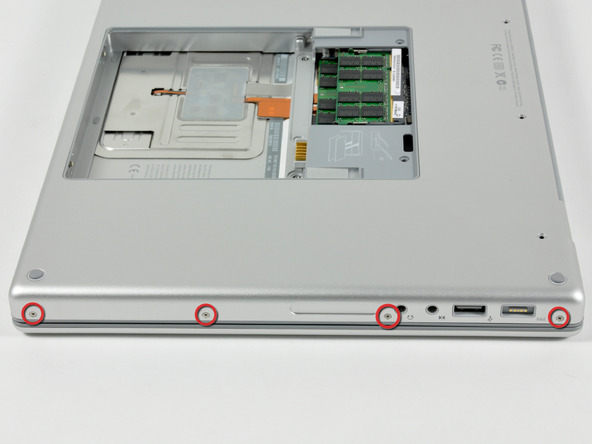
Step 7: Remove the screws on the other side
Turn the MacBook a quarter turn and remove the last few screws on this side to release the MacBook from the case.
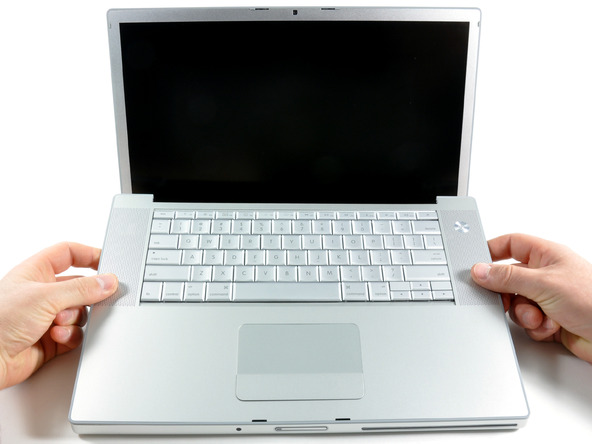
Step 8: Carefully lift the top up
Carefully lift the top (keyboard side) up. Do not pull it up, but do not raise it all the way, as the trackpad is still attached with a short cable (see step 7). Lifting the ca